To install wordpress via SSH you need a VPS with –
A non-root user account
Apache installed and running
Mariadb / MySQL active and running
PHP installed (recommended version 7.x)
First install PHP modules php-gd and php-xml otherwise certain features in wordpress will not work properly.
sudo yum install php-gd
sudo yum install php-xml
Now restart the server for changes to take effect.
sudo service httpd restart
Next we need to install wget if you haven’t already. Without wget we won’t be able to download wordpress
sudo yum install wget
Now go to your home directory cd ~ or cd $HOME
Download wordpress using the following command
wget http://wordpress.org/latest.tar.gz
Now we are going to extract the contents of our downloaded file latest.tar.gz to the document root or the directory in which you want to install wordpress.
I am going to install wordpress in /var/www/html/example.com where example.com is the domain specific directory about which I talked in my virtual host tutorial
sudo tar -xvf latest.tar.gz -C /var/www/html/example.com --strip 1
After running the above command all the required wordpress files and directories will be extracted to your specified directory.

Now go to the directory where you extracted latest.tar.gz in the previous step and create a new directory named uploads inside the wp-content directory using the command below
sudo mkdir wp-content/uploads
Now we need to create wordpress configuration file wp-config.php with the contents
of wp-config-sample.php
sudo cp wp-config-sample.php wp-config.php
So now our wordpress configuration file wp-config.php has been created its time to edit this file with database details.
If you have already created database and user for your wordpress installation then skip this step.
First log in to mariadb MySQL database management system.
mysql -u root -p
After logging in create a new database with the following command. (Replace my_database with the name that you want to give to your database)
CREATE DATABASE my_database;
Next grant all privileges and create a new user for the database. (Replace username with the name you want to give to the database user and in place of pass enter a strong password)
grant all privileges on databasename.* to username@localhost identified by 'pass';
Other useful commands
To view databases:
show DATABASES;
To view users
SELECT User, Host FROM mysql.user;
Now that we have database name, user and password we are going to edit wp-config.php
Open the file in vi or any other editor of your choice
sudo vi wp-config.php
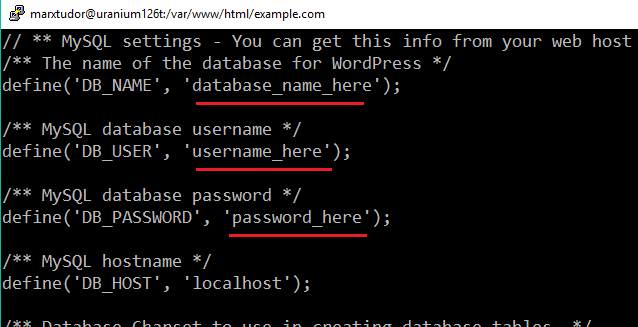
In this file you need to edit those three things which I have underlined in place of database_name_here enter your database name it should be inside single quotes
Replace username_here with the username you created in the previous step and password with the password you assigned while creating the user.
After making the necessary changes save and quit the file.
This step is optional. Create a .htaccess file in the main directory where all your wordpress files are. Sometimes .htaccess doesn’t generate on its own.
sudo vi .htaccess
Copy and paste the following code in the .htaccess file and then save and quit the file.
# BEGIN WordPress
<IfModule mod_rewrite.c>
RewriteEngine On
RewriteBase /
RewriteRule ^index\.php$ - [L]
RewriteCond %{REQUEST_FILENAME} !-f
RewriteCond %{REQUEST_FILENAME} !-d
RewriteRule . /index.php [L]
</IfModule>
# END WordPress
The last thing you would want to do is change the ownership of wordpress files and directories.
sudo chown -R apache:apache /var/www/html/example.com
This will change the owner and group of files and directories to apache which is an equivalent of www-data in Centos.
Now everything is done, open the url of your website in your browser and you would see wordpress installation page
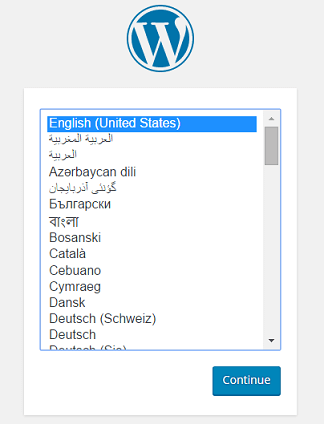
Every thing from here on is very self explanatory you just need to choose your language and create a wordpress admin account.

3 Comments. Leave new
thanks for your tutorial, really helped me out setting up my VPS
is very helpful thank you so much
Thank you, It’s verfy helpful.