The first step involves logging into the VPS server with the root account and then creating a new non-root user account.
Download putty for windows which is a client use to login into the server
https://www.chiark.greenend.org.uk/~sgtatham/putty/latest.html
Mac users don’t need to download putty there is a built in tool called the terminal which is an equivalent of putty.
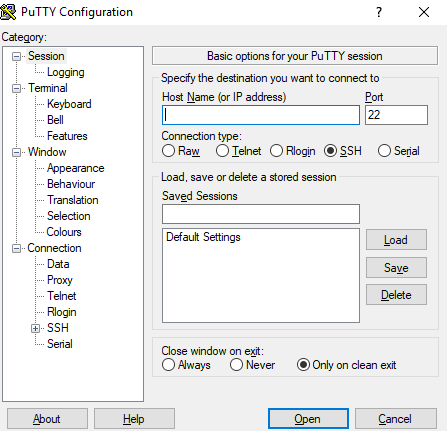
Open putty and put your server’s ip address, make sure the port is 22 and SSH radio button is selected.
Click on open then login as root.
Mac users can use this command to login
ssh root@Your_Server's_Ip_Address
Create a new user (use the command, you can add any name in place of marxtudor)
adduser marxtudor
passwd marxtudor
After successfully creating a new user and assigning password to it, give the new user root access using the below command.
gpasswd -a marxtudor wheel
After the user gets added to the wheel group login using the newly created user either by closing and reopening putty to login again or by using this command
ssh marxtudor@server’s_ip_address
From now on use the newly created non-root account. It is not a good practice to use root account and later you will learn how to disable root login.
In the next step we are going to install Apache server
